5.8 KiB
Creating a sign-in form
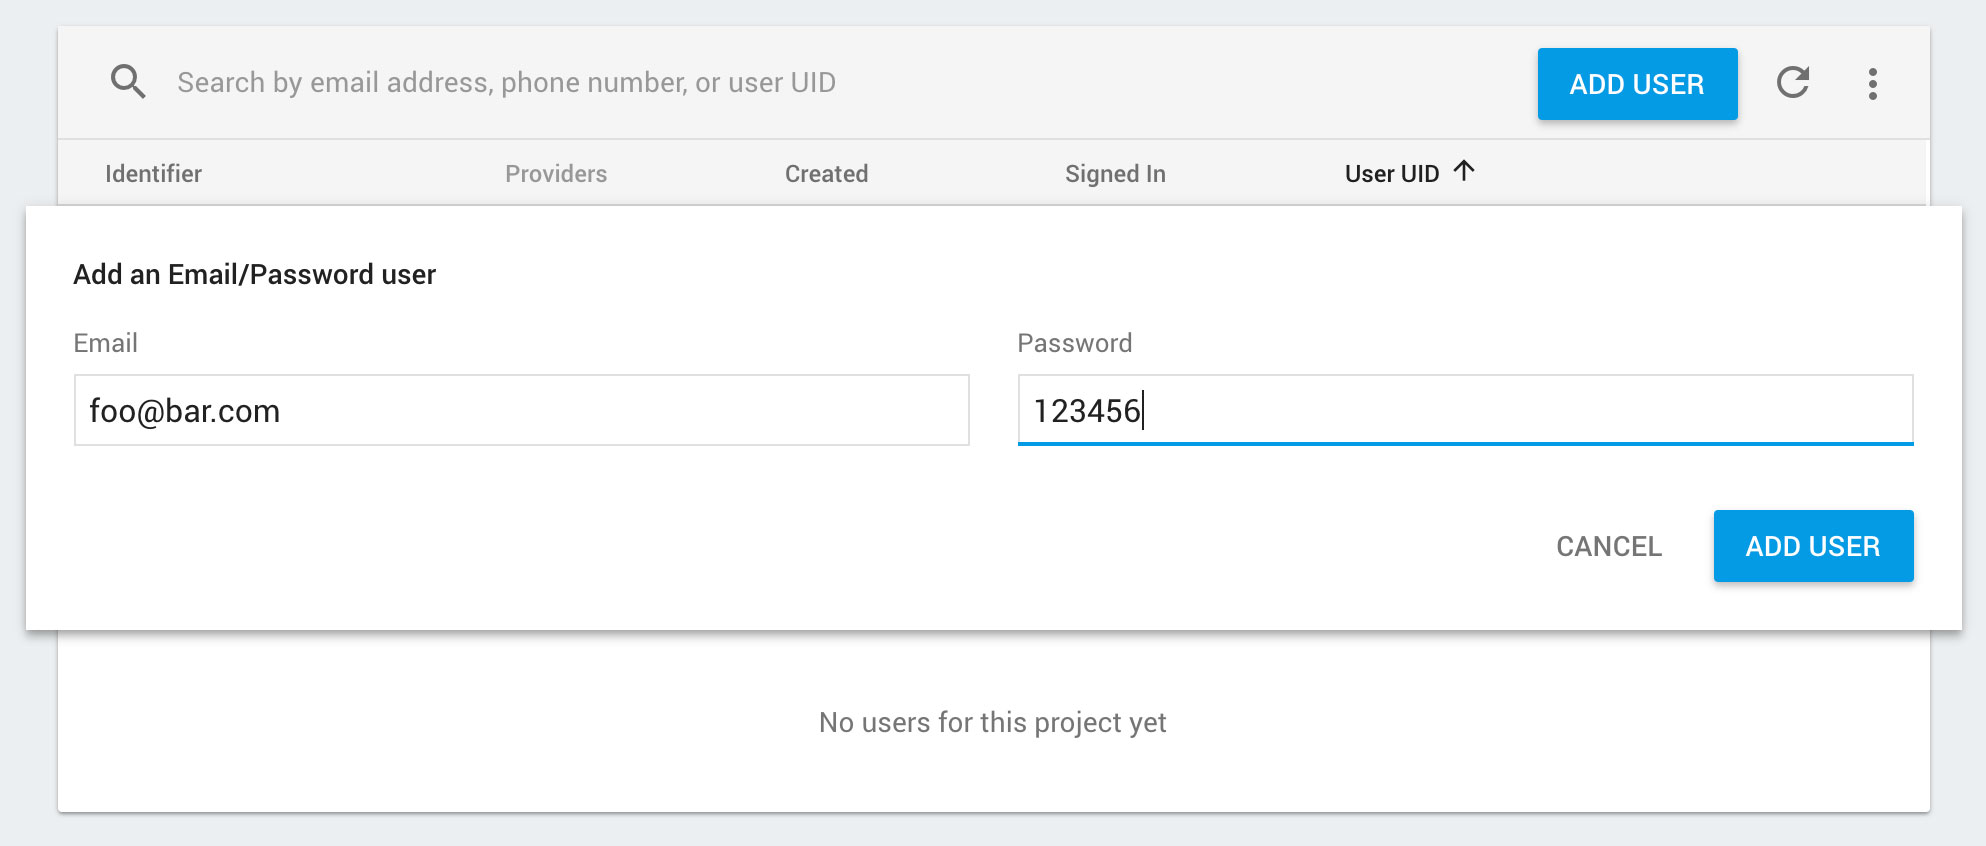
We can now get onto allowing the user to login with their email and password. First off we need to create a dummy user for testing. This can be done via the Firebase console on the 'Authentication' tab. Lets go ahead and create one now:
Handling user input
React Native provides us with a TextInput component, which renders the web
equivalent of an input box in our app. TextInput components are 'uncontrolled' meaning we have to explicitly give it a value and handle
updates the user enters. We're going to do this via component state, however you could also do this via our Redux store which is an option
other React developers would go down.
// src/screens/unauthenticated/Login.js

import React, { Component } from 'react';
import { View, TextInput } from 'react-native';

class Login extends Component {
  static navigationOptions = {
    title: 'Login',
    headerStyle: {
      backgroundColor: '#E6853E',
    },
    headerTintColor: '#fff',
  };

  constructor() {
    super();
    this.state = {
      email: '',
      password: '',
    };
  }

  _updateEmail = email => {
    this.setState({ email });
  };

  _updatePassword = password => {
    this.setState({ password });
  };

  render() {
    return (
      <View>
        <TextInput
          placeholder={'Email Address'}
          onChangeText={this._updateEmail}
          value={this.state.email}
        />

        <TextInput
          placeholder={'Password'}
          onChangeText={this._updatePassword}
          value={this.state.password}
        />
      </View>
    );
  }
}

export default Login;
If you reload your app, you will see two plain TextInput boxes which can accept input. As these are updated, the onChangeText prop is triggered
which then updates state for that specific value. The inputs then individually update whenever their value from state changes:

If you want to hide your users password, use the
secureTextEntryprop.
Communicating with Firebase
Now we've got our users input readily available in state, we can use the values to send to Firebase! First off we need a trigger to do this:
// src/screens/unauthenticated/Login.js

import React, { Component } from 'react';
import { View, TextInput, Button } from 'react-native';

    ...

    _signIn = () => {

    };

    render() {
        return (
            <View>
                <TextInput
                    placeholder={'Email Address'}
                    onChangeText={this._updateEmail}
                    value={this.state.email}
                />

                <TextInput
                    placeholder={'Password'}
                    onChangeText={this._updatePassword}
                    value={this.state.password}
                />

                <Button
                  title={'Sign In'}
                  onPress={this._signIn}
                />
            </View>
        );
    }
As mentioned in 'Understanding Firebase Auth', we can call the signInAndRetrieveDataWithEmailAndPassword method on the Firebase API within our _signIn method,
using the state values.
// src/screens/unauthenticated/Login.js

import firebase from 'react-native-firebase';

  ...

  _signIn = () => {
    // extract the values from state
    const { email, password } = this.state;

    firebase.auth().signInAndRetrieveDataWithEmailAndPassword(email, password)
      .catch((error) => {
        console.error(error);
      });
  };
The Firebase call will catch any errors (see list here) which may occur, such as a bad email address or incorrect email/password combination.
You may notice we don't listen our for the success response from the call (via the .then). As you may remember, back in our App component
our listener using onAuthStateChanged will pick up any successful sign in that occurs - and you guessed it, update the Redux store with
our users details, which causes App to re-render with our new AuthenticatedStack!
The Welcome component implemented below on the AuthenticatedStack contains a button which calls firebase.auth().signOut(), which triggers the
reverse motion of showing the UnauthenticatedStack to the user - simple!

You may notice there's a delay when pressing the "Sign In" button and the
onAuthStateChangedlister firing. An app should always give feedback to a user when an action is happening. This can be accomplished through state/redux using many of the React Native components available such asActivityIndicator. You'll also want to handle any errors back from Firebase to show to your user!
Register / Forgot Password
The logic for registering or submitting a forgot password request is exactly the same as our sign in logic. Simply follow the same pattern
as we've done above using TextInput components and state. Once you've got the desired information, call Firebase with the methods you need, such as
createUserAndRetrieveDataWithEmailAndPassword
or sendPasswordResetEmail!
Remember to allow the user to navigate between these screens using the navigate method provided by react-navigation.
You could also try implementing
TabNavigationto allow horizontal navigation between screens which is another common navigation pattern.