|
|
||
|---|---|---|
| app | ||
| config | ||
| readme_images | ||
| schema | ||
| tests | ||
| .gitignore | ||
| Dockerfile | ||
| LICENSE.md | ||
| Pipfile | ||
| Pipfile.lock | ||
| README.md | ||
| run.py | ||
README.md
CR Connect Workflow Microservice
Development Setup
Tools
These instructions assume you're using these development and tools:
- IDE: PyCharm Professional Edition
- Operating System: Ubuntu
Environment Setup
Make sure all of the following are properly installed on your system:
python3&pip3:pipenv:
Project Initialization
-
Clone this repository.
-
In PyCharm:
- Go to
File > New Project... - Click
Pure Python(NOTFlask!!) - Click the folder icon in the
Locationfield. - Select the directory where you cloned this repository and click
Ok. - Expand the
Project Interpretersection. - Select the
New environment usingradio button and choosePipenvin the dropdown. - Under
Base interpreter, selectPython 3.6 - In the
Pipenv executablefield, enter/home/your_username_goes_here/.local/bin/pipenv - Click
Create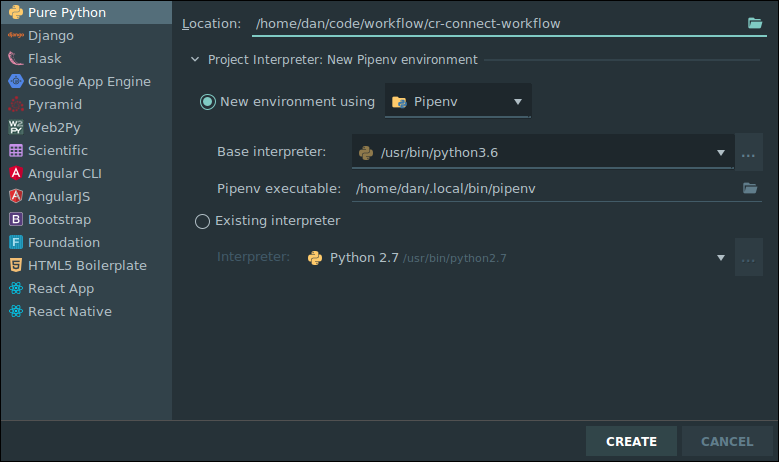
- Go to
-
PyCharm should automatically install the necessary packages via
pipenv. For me, the project interpreter did not set set up for me correctly on first attempt. I had to go to File -> Settings -> Project Interpreter and again set the project to use the correct PipEnv environment. Be sure that your settings like simliar to this, or attempt to add the interpreter again by clicking on the gear icon.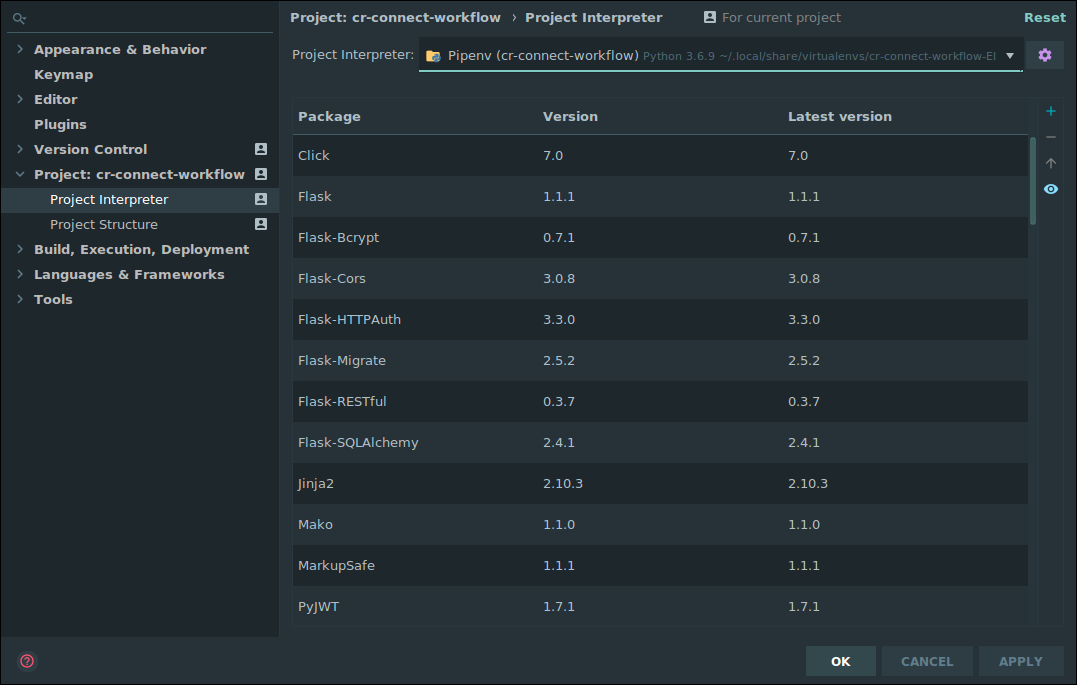
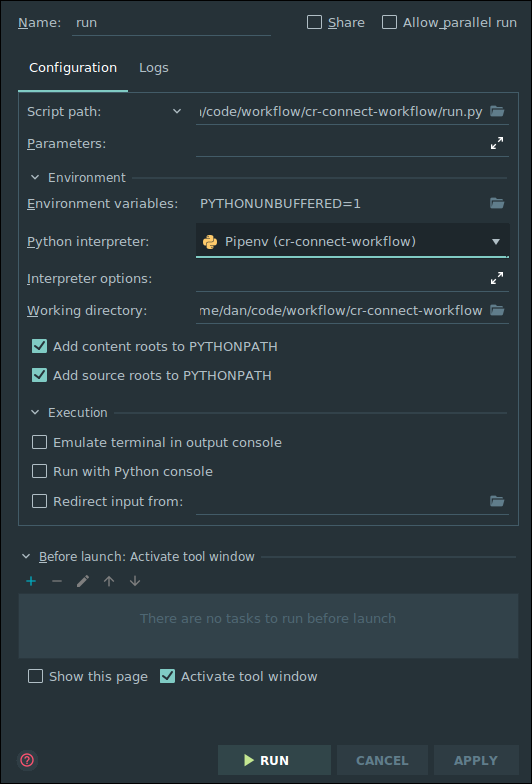
-
With this properly setup for the project, you can now right click on the run.py and set up a new run configuration and set up a run configuration that looks like the following (be sure to save this run configuration so it doesn't go away.) :
Running the Web API
Just click the "Play" button next to RUN in the top right corner of the screen. The Swagger based view of the API will be avialable at http://0.0.0.0:5000/v1.0/ui/
Testing from the Shell
This app includes a command line interface that will read in BPMN files and let you play with it at the command line. To run it right click on app/command_line/joke.py and click run. Type "?" to get a list of commands. So far the joke system will work a little, when you file it up try these commands in this order:
> engine  (this will run all tasks up to first user task and should print a joke)
> answer clock (this is the correct answer)
> next (this completes the user task)
> engine (this runs the rest of the tasks, and should tell you that  you got the question right)
You can try re-running this and getting the question wrong. You might open up the Joke bpmn diagram so you can see what this looks like to draw out.
Additional Reading
- BPMN Is the tool we are using to create diagrams of our business processes. It's is a beautiful concise diagramming tool. We strongly recommend you read this complete tutorial, as this notation is the foundation on which this project as well as many other software systems for businesses are built. Know it well.
Notes on Creating Good BPMN Diagrams in Comunda
-
Be sure to give each task a thoughtful (but unique!) id. This will make the command line and debugging far far easier. I've tended to pre-fix these, so task_ask_riddle if a task is asking a riddle for instance.